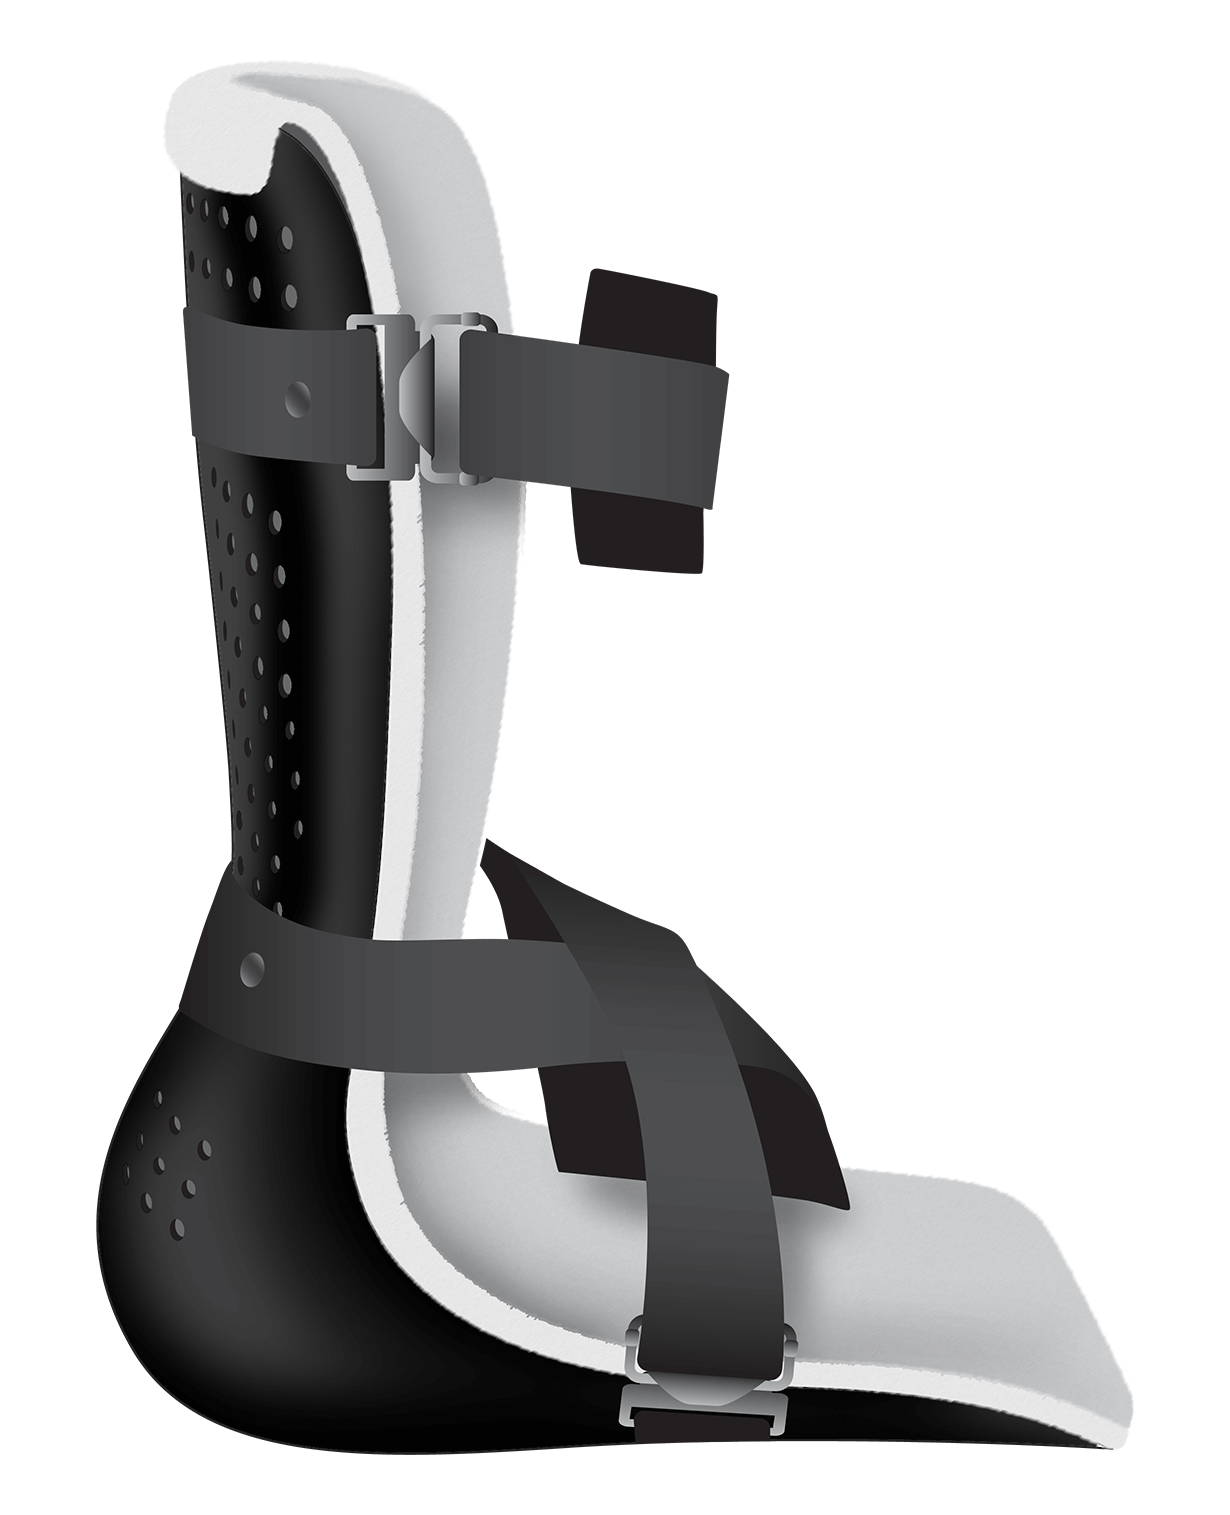
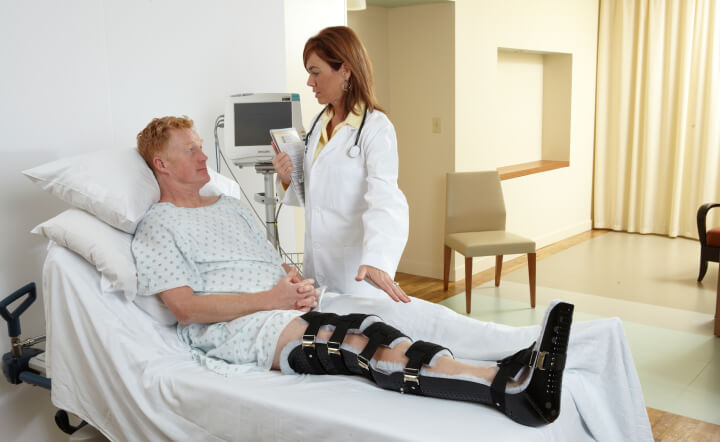
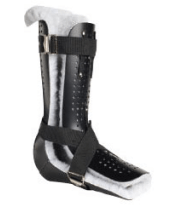
The splint's straps make donning and doffing for therapy and wound care easy.
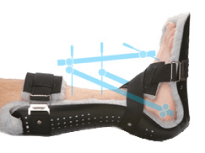
The anatomical contours are the backbone of the splint's superior fit.
The expanded heel pocket supports deep heal relief.

The splint's hospital-grade alloy shell is malleable for optimal fit yet rigid enough be be highly durable.
The functional ankle position reduces the risk of stiffness and speeds healing.

Applications
Level 1 Trauma Orthopaedic Trauma
- Open fractures
- Closed fractures
- Wounds
- Fasciotomy / Flap
- Nerve injuries
Orthopaedic Fracture Stabilization
- Calcaneal
- Pilon / Talar
- Tibia / Fibular
- Ankle
- Distal femur
- Tibial plateau
- Complex knee
Plastics / Burns
- Grafts
- Wounds
- Fasciotomy / Flap
General and Vascular Surgery
- Multiple trauma
- Wounds
- PVD / Diabetes
Neuro
- Contracture prevention: TBI, CVA, SCI
General Orthopaedics
- Hindfoot injuries
- Forefoot injuries
- Plantar fasciitis
- Heel spurs
- Tibia / Fibular fractures
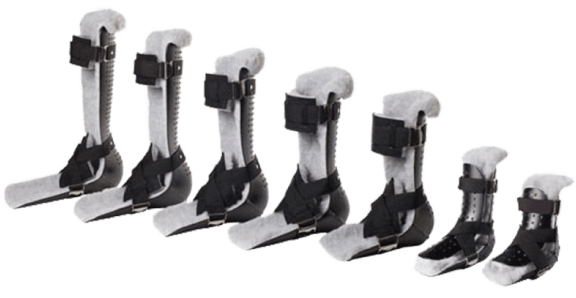
Sizing
- Allow for a hand’s width between back of knee and top of splint.
- Toes should not extend over the splint.
- The splint must allow full knee flexion.
- DO NOT OVERTIGHTEN the straps. There should be space for a finger to slide between the skin or dressing and the strap pad.
Extra Large
Large
Medium
Small
Youth
Child
Toddler
Customization and Use
How to Customize the Seattle Splint
The Seattle Splint’s malleable alloy shell allows practitioners to form the splint to fit each patient. The sides of the splint, the ankle width, and angle of the splint can be modified without tools.
Our orthoses are professional products designed to be custom fit by knowledgeable practitioners. In addition to the information here, we gladly provide training and support as needed via video conferencing.
Request a live video demonstration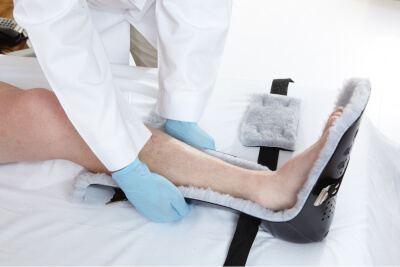
Conform to the Calf
While the Seattle Splint is on the patient, cradle the back of the splint in your hands and squeeze the sides together to narrow and form the splint around the calf.
Adjust the Calf Width
Place the back of the Seattle Splint against your chest for support as you spread the splint’s sides to the desired calf width.
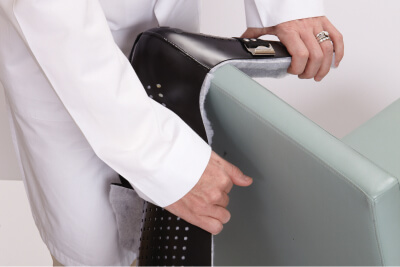
Adjust the Ankle Width and Angle
Position the Seattle Splint over the back of a chair and push down above, and then below the weld line to adjust the splint’s ankle width or increase dorsiflexion by up to 5°. Never push directly on the weld line.
Placement
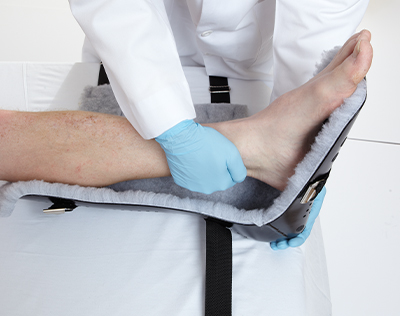
Place foot flat against the foot plate.
Gently, yet firmly, push down at the anterior ankle to slide the foot down into the splint at a neutral position.
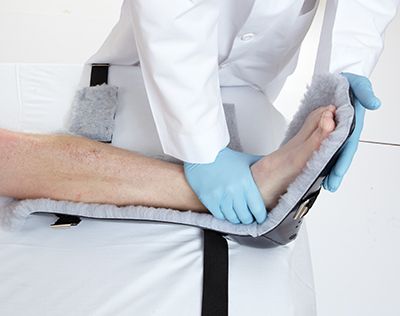
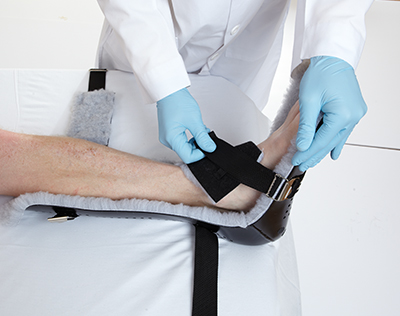
Straps
First, cross the padded ankle strap over the ankle to buckle.
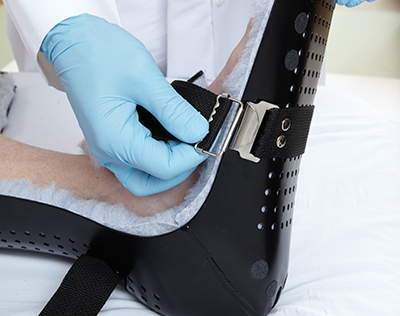
Slide the bar of the slide buckle into the hook buckle.
Pull on the strap to tighten.
DO NOT OVERTIGHTEN.
A finger should easily slide under the pad.
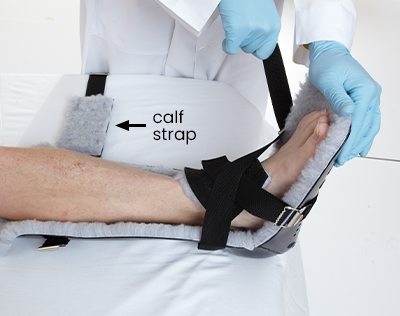
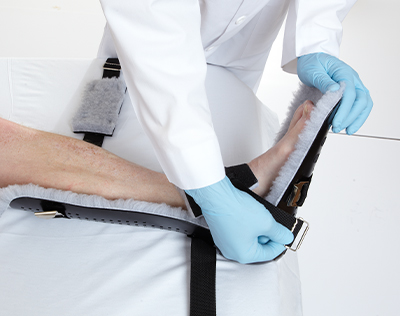
Cross the second ankle strap over the pad. Buckle. Bring the padded calf strap across the tibia and buckle.
Buckles
To Hook

1. Straight bar goes into hook.
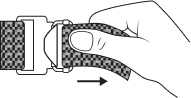
2. Pull strap end to tighten.
To Release
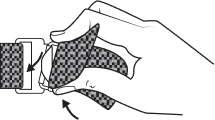
1. Pull strap end over buckle.
2. Push thumb under strap behind buckle and turn bar out of hook.
Patient Instructions
The patient instructions are a printable document for practitioners to use when sending a patient home with a Seattle Splint. This document explains how to put on and remove the splint, how to use the buckles, how to properly take care of the splint, and a section for practitioners to fill out wear schedule and instructions.
Optional Components
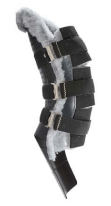
Thigh Extension
The thigh extension attaches to any adult-sized Seattle Splint, converting it to a Seattle Long Leg. When accurately sized to a splint, the knee is positioned at 0°. Strategically placed movable straps provide counterforce while relieving circumferential pressure. The converted Seattle Splint allows easy access for dressing changes, wound care, arterial monitoring and therapy.
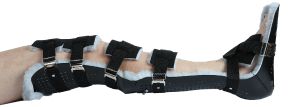 Shown: a Seattle Long Leg
Trauma Indications
- Fractures
- Complex knees
- Wounds
- Fasciotomy / Flap / Grafts
- Nerve injuries
Anterior Shell
The Anterior Shell provides counterforce and support to ensure a neutral position of the ankle in cases of deformity or high tone. The shell distributes pressure to prevent further complications in patients with pitting edema or fragile skin.
EF Series
The EF Series is designed exclusively for patients with distal tibia/pilon/calcaneal external fixation.
Additional Components
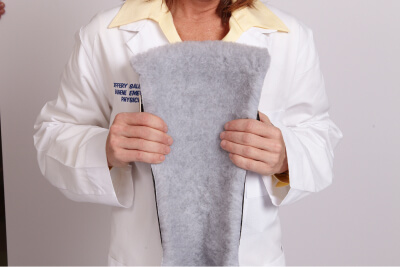
Replacement Liners and Replacement Pads